Sunday, July 27, 2008

Watermelon Pickles

watermelon rind pickles

Quick! While watermelons are in abundance! MAKE THESE PICKLES! I would never, ever steer you wrong. As I've said elsewhere, these things are DIVINE. And as always, if I can do this, ANYONE can do this. Here's the recipe.

WATERMELON PICKLES

3 lbs. watermelon rind, peeled and cut into 1-inch cubes
5c Sugar
2c Apple Cider Vinegar
1c Water
2T Whole Cloves
1 ½ T Whole Allspice
2T Stick Cinnamon (I wasn't sure how to translate that, but I used 6 sticks)
1 Lemon sliced

Let cubes soak overnight in large pot in salted water to cover. Drain. Cover with fresh cold water. Bring to boil and cook over low heat until tender. Drain. Combine rest of the ingredients and stir over medium heat until tender. Boil 5 minutes. Add watermelon-rind cubes; simmer until transparent-About 15 minutes. Remove spices and pack pickles into jars and process in a water-bath canner for 15 minutes.

And here are my notes, gathered from asking around and examining other recipes:

Peel the smooth, shiny outer skin from the rind, using a potato/carrot peeler. You don't have to take off any more than the outermost skin.

watermelon rind soaking in brine

For the overnight soaking, use 1/4 cup pickling salt for each quart of water needed to completely cover rind chunks. For the rind from one large watermelon (the weight of which I have NO idea), this came out to about 2 quarts of water and 1/2 cup of pickling salt.

boiling watermelon rind

I rinsed the cubes twice, then covered them in fresh water and brought them to a slow boil. I cooked them until they were tender but not yet translucent.

apple cider vinegar, water, sugar, lemons, cinnamon, allspice, cloves

I went ahead and pre-cooked the pickling mixture just enough to get all the sugar dissolved and get the ingredients to start melding together well.

combine, heat

After combining everything, I'm pretty sure I let it cook for a bit longer than 15 minutes. I let the melond-rind chunks get fairly translucent, but not soft or soggy.

I would add that YES, you DO need a jar funnel. Don't be like me and think you don't. You do. You also need one of those jar-lifters, while you're at it. Now get pickling!

Jars of Watermelon Pickles

Friday, July 25, 2008

Pea-Hull Jelly (Purple Hull Peas)

hulls and their jelly

before & after

After shelling purple-hull peas, save the hulls, and wash them at least three times.

washing hulls

Pack clean hulls into a heavy pot, and cover with about 5 cups of water.

pack hulls into a heavy pot, cover with water

Boil hulls until tender. It's not the hulls you're concerned with--it's the purplish "tea" that you're making of the boiling water. Steep those babies until the water's pretty and purple.

steamy

Strain the "tea" from boiling the hulls, and pour 4 cups of it back into the saucepan.

strain liquid from boiling hulls into saucepan

Bring juice to a boil, then add 1 package of Sure-Jell (fruit pectin). Return liquid to a rolling boil, and add 5 cups of sugar.

boil, add pectin, boil, add sugar, boil, simmer

Return liquid to a rolling boil again, and boil for 15 minutes. Remove from heat and set aside for 5 minutes. Skim. Pour into hot, sterilized jars, seal, and process in a water-bath for 5 minutes. Set jars aside on a towel for 24 hours.

strain into jars, seal

Thursday, July 24, 2008

Pizza Night

(cross posted at Ninja Poodles!)

construction begins

I haven't gotten to the stage where this is all fun and easy like everyone says it's supposed to be, but maybe if we keep trying, huh? Maybe individual pizzas would be better, like Mir does. It's a heck of a mess to clean up, but maybe if I could get everyone involved in that, just like with making it, it would help? Yeah, I'm a genius. Someone let me know how that works, m'kay?

Pizza Night has potential, though. And I do REALLY love this recipe for pizza crust, adapted from the recipe that comes with Ricki Carroll's 30-Minute Mozzarella Kit, which I've discussed here already. This is one of those activities that has a very high "kid-friendly" rating, if you're keeping score.

Quick & Easy Pizza Dough (makes one 14" thick crust or two 12" thin crusts...or, you know, several that are smaller than that--whatever)

3-3.5 cups all purpose flour (I used white whole wheat)
1 pkg. or 1 Tbsp. rapid-rising yeast
3/4 tsp. salt
1 cup very warm--not hot--whey (you could also use buttermilk, or even regular milk)
2Tbsp. olive oil
1 Tbsp honey
Cornmeal for dusting pan

Combine 2 cups flour, dry yeast and salt, then stir in warm whey, olive oil, and honey until mixture is moist throughout. Stir in enough of the remaining flour to make a soft dough. Knead on lightly floured surface for about 5 minutes, until dough is smooth and elastic. Cover, and let rest on floured surface 10 minutes.

If you're in a hurry, just go on ahead with the next step after the 10 minute rest--it'll turn out fine. But if you have time, let the dough rise until doubled. It rises pretty quickly, so just get it ready 30 minutes to an hour ahead of time, and you'll have plenty of time for a rise. Then punch dough down and continue.

Lightly oil pizza pan(s), sprinkle with cornmeal, and roll dough out to fit pans. At this point, you can top your pizza(s) and bake them at 400F for 20-30 minutes 'til done. OR, if you have a few extra minutes, pre-bake the crust before topping it. Just prick the crust with a fork, and bake it for 5 minutes or so, until the surface is a little toasty. Then top and bake as usual.

Again: The steps you may omit are the rising of the dough and the pre-baking of the crust.


this is where you put your preschooler to work

Yum! Now, since we've conquered the crust and the cheese, if someone has a great homemade pizza SAUCE recipe, let's have it!

when I say from scratch, I mean from SCRATCH

Friday, July 18, 2008

Homemade Soft Pretzels

There is also an Alton Brown recipe for these that looks promising, but I haven't yet tested it. But this one, this one is easy, fast, and VERY authentic with the inclusion of a boiling in water and baking soda prior to baking. I encourage you to try this, if you don't already make pretzels. If I can do it...well, you know the rest.

SOFT PRETZELS

For pretzel dough:

1 packet active dry yeast
1 C. warm (NOT HOT) water
2-3/4 C. flour
1 T. sugar or equivalent in honey
1/2 t. salt (slightly more if using kosher salt)
2 T. olive oil (you could also use softened butter)

For boiling:

4 C. water
2 T. baking soda

For topping pretzels prior to baking:

2 T. kosher salt OR herbs of choice OR cinnamon sugar OR finely grated cheeses OR anything your imagination dictates

Directions:

Add yeast and sugar or honey to warm water; let sit 5 minutes to allow yeast to get foamy.

Combine 1-1/2 cups flour, salt and oil in a large mixing bowl. Add yeast mixture and stir, or mix with stand-mixer, until well-combined. Add remaining 1-1/4 cups flour. Knead dough 3 minutes by hand, or half that time using a stand mixer with dough-hook attachment; form dough into a ball, lightly oil dough, turning to coat, cover, and rise for 1 hour. Dough should double in size. (I like to use my trusty old microwave trick here: boil a cup of water in the microwave, then push the cup of hot water into the corner and place your covered bowl with the dough in it inside the microwave and shut the door. DON'T TURN ON THE MICROWAVE.)

Punch down dough and divide it into 12 equally-sized pieces, and roll each piece into a ball (dust hands with flour to prevent sticking). Place balls on a cookie sheet or lightly floured surface. Cover lightly and rise for 15 minutes or so. Don't crowd them together on a plate like I did--it's not a disaster when they stick together, but it is a pain.

Roll each ball into a 16-inch length (make a snake!) and form into a pretzel shape. Or, divide each ball in half and roll each half into a 3-inch stick, about 3/4-inch wide. Let rest a few minutes so they can "fluff up" a bit.

Meanwhile, preheat oven to 475°F. Grease, or spray with cooking spray, a large cookie sheet. In a non-aluminum pot, bring remaining 4 cups water to a boil with baking soda. Add pretzels to the boiling water in batches (do not crowd) and boil 1 minute each, turning once.

pretzels boiling

Scoop pretzels out with a slotted spoon, allowing excess water to drip through. Place pretzels on cookie sheet and sprinkle with kosher salt or other desired toppings. Bake 10 minutes, until golden brown.

Makes 12 large pretzels or 24 sticks.

These yummy snacks are DEFINITELY best eaten right out of the oven, BUT, if you want to make a larger batch and store some, LEAVE OFF THE SALT or other toppings before baking. Bake them plain, and allow to cool COMPLETELY. Once the pretzels are TOTALLY cooled, place them into the freezer on an uncovered cookie sheet for flash-freezing. Once they're frozen solid (an hour or so--do NOT forget and leave them there overnight), place them into freezer bags for storage.

When it's time to prepare one for a snack, take it out of the freezer, and place onto a paper towel. Have your desired topping, salt, cinnamon sugar, whatever, ready to use, and working QUICKLY, one pretzel at a time, dip your finger into some water and brush the water over the tops of the frozen pretzels. Before the water can dry (seriously, work fast), sprinkle on the toppings. Then heat in the microwave in short bursts until pretzels are warm and soft. They'll be almost as good as when they were fresh from the oven.

My friend Erin informed me that her grandmother always brushed her pretzels with melted butter, and I have to admit that sounds divine. With the frozen ones, you could probably use the butter instead of water to make your toppings stick, too. That would be especially yummy with the sweet versions, and none too shabby with salt or other savory variations, either!

So now you have the straight dope: Go forth and pretzel! YUMMMMM.

homemade soft pretzels

Monday, July 14, 2008

Easy Cheesey

You want Mozzarella Fresca. You want to make it yourself. Seriously, you do. You cannot imagine how easy and quick it is. First, just go and get this kit, since it comes with everything you need, plus recipes. It includes enough stuff to make 30 pounds of cheese. Here, watch this.

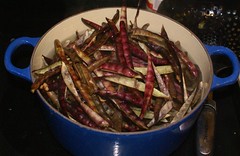
You get some milk. Your only real limitation is that it can't be "ULTRA" pasteurized. I was kind of astonished at how that limits your selection at the grocery store. If you have a cow or a goat, more power to you. Anyway, you dissolve some citric acid 
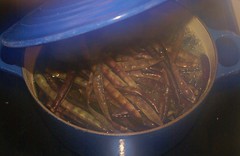
(included in your mozzarella kit) into a bit of distilled water, then stir that into the milk, and start gently heating it to 86 degrees F. 
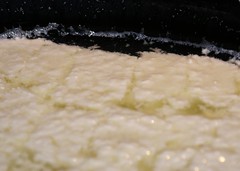
(There is a dairy thermometer included in the kit.) The milk will curdle. This is good.

curds forming

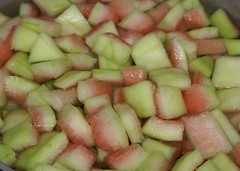
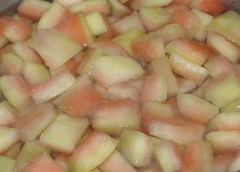
At the desired temperature, you dissolve a teensy bit of vegetable rennet into a bit of distilled water, then add that while gently stirring the milk, which has been removed from the heat. You only stir a few seconds, then just leave it alone for 5-8 minutes. When you come back, the curds should have separated from the whey. Recite "Little Miss Muffett," and then slice the curds into cubes. Optimally, they'll be fairly solid, like silken tofu, floating in clear yellow whey, so that you can ladle them out gently with a large slotted spoon, into a glass bowl.

curds separating from whey

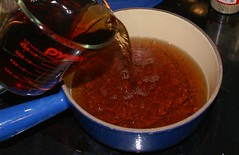
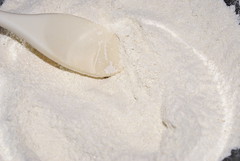
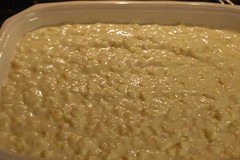
If they're not holding together so well (these weren't), never fear. Just pour the whole mess into a giant bowl, through a large piece of butter muslin (included in the kit), and strain the whey out. What's left behind in the muslin will be your cheese curds.

In a glass bowl, zap the curds in the microwave for about a minute. 
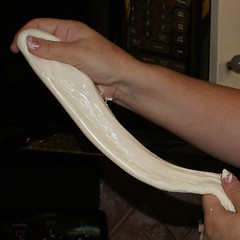
(There is a microwave-free method that uses the heated whey; it's explained in the instructions that come with the kit.) Take them out and knead them like bread dough. You know, if bread dough was the consistency of ricotta. As you do this, more whey will be released from the curds, which will become firmer. Pour it off, and re-nuke the curds for about 30 seconds. Knead them again, being careful because they'll be getting hot. If you've ever made taffy, you'll be right at home. On the second or third heating, your curds will be getting melty and shiny, at least in the bowl. Knead them, and give them the stretch test.

stretching fresh mozzarella, by Bella

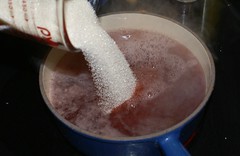
If the cheese breaks instead of stretching, it's not quite done. Heat it again and knead some more. Start tasting the cheese, too. This is a good time to add a teaspoon or two of cheese salt (if you like--included in the kit), or any herbs or other flavor additives you might desire. Your cheese should be just about too hot to handle, and it should be getting very shiny and very stretchy!

stretch and shine, by Bella

It will also be tasting DELICIOUS. If you can get from this point to actually using the cheese in a recipe, you're showing remarkable restraint, because you're going to want to just eat it ON THE SPOT, while it's warm. No lie. My daughter tried repeatedly to convince me that "we could just eat this cheese for dinner, just like this, with nothing else, RIGHT NOW before Daddy gets home." This is a great thing to make with kids, but be sure to give them rubber gloves, since they don't have "Mom skin" on their hands.

good stretch and shine, by Bella

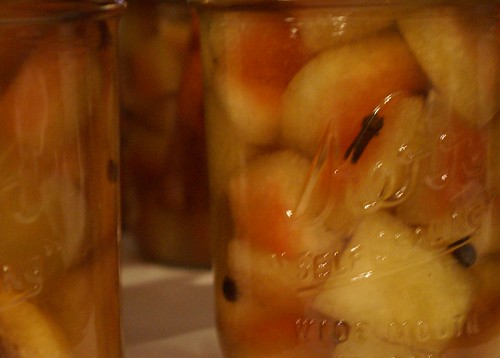
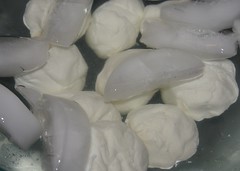
When the cheese is shiny, smooth, and stretchable, start forming it into smallish round balls and plop the balls into a bowl of ice-water, for rapid cooling. Go ahead and make a joke about putting your balls on ice. You've earned it.

fresh cheese balls on ice, make your own joke

That's it! You have just made 
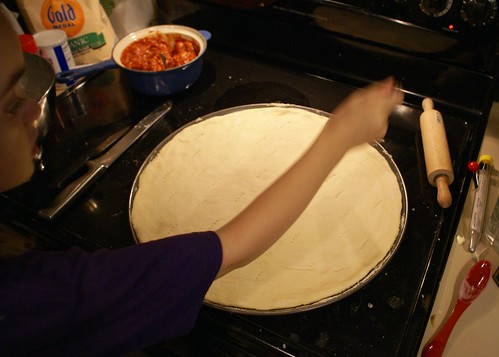
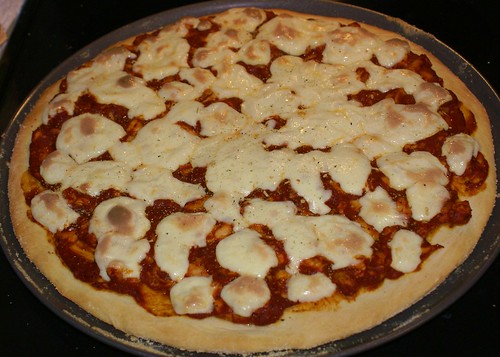
Mozzarella Fresca, and it took no more than 30 minutes, most of which were spent doing nothing but waiting. Aren't you pleased with yourself? But WAIT. That's not all. Remember all that whey you poured off the cheese? There's, like, 3/4 of a gallon of that stuff. Save it--it's liquid gold. To feel like a total superwoman (or man), go ahead and use a cup of it RIGHT NOW to make an easy, no-muss pizza dough. I'll print the recipe for that tomorrow. Tell the truth--will you not feel like something else entirely, when you serve a pizza and say that you made everything from the crust to the sauce to the CHEESE? Seriously. You are awesome. Respect.

Thursday, July 10, 2008

Spoon-Tastic!

why it's called spoon bread

This is an easy fresh corn spoonbread that is a great dish to make with kids--it's pretty much all about measuring and stirring and pouring, which are MY kid's favorite things to do in the kitchen. The recipe is from Southern Living, and is credited to Beth Trueblood of Lanesville, Indiana.

Fresh Corn Spoonbread

Ingredients:

1 cup white cornmeal mix
1/2 cup all-purpose flour
1/4 cup sugar (or equivalent in honey)
1 teaspoon salt
4 cups fresh corn kernels (about 5 to 6 ears)
2 cups plain yogurt
3 large eggs, lightly beaten
1/4 cup butter, melted

Mix together dry ingredients, set aside.


cornmeal mix, flour, sugar, salt

Stir together corn and all remaining ingredients.

fresh corn, yogurt, eggs, melted butter

Add corn mixture to dry mixture, stirring just until blended and moist throughout. Pour batter into a 2-quart baking dish that's been sprayed with cooking spray.

mix dry and wet ingredients, pour into baking dish

Bake at 350 degrees for 45 minutes, until golden brown and set in the center. I may have tented some foil over the top for the last 20 minutes or so...I really can't recall. Just eyeball it, and don't let the top and edges dry out during baking.

bake at 350F for 45 minutes

Enjoy! It's some yummy stuff.

why it's called spoon bread

Thursday, July 3, 2008

Fried Green Tomatoes. Yes, They're That Good.

This recipe almost doesn't need words, but I'll use a FEW. Get some of these:

dinner

I have actually had people tell me that they couldn't find "this kind" of tomatoes, only the red ones. Well, these are the red ones. They're just not ripe yet. The rest of you quit laughing. There are actually people who have never seen a tomato before it hit the grocery store. Green tomatoes are apple-firm and wonderful to work with. A lot of people seem to prefer the ones that have just a hint of pink blush forming, but I like the pure greenies. I like fried pickles, too, though, so take that into account when you select your degree of green-ness.

Slice 'em up. I like to do them at an angle instead of straight across the middle, but that's just me. I promise the tomato-slicing police will not show up at your house if you do it differently.

sliced

Have a shallow dish of buttermilk, salted and peppered to taste, at hand, and as you slice the tomatoes, add the slices to the buttermilk. They don't have to soak or marinate, but a couple extra minutes couldn't hurt, right?

salt, pepper, buttermilk

In another shallow dish, combine equal parts cornmeal or cornmeal mix, and flour. Take the tomato slices from the buttermilk, and dredge them in the flour mixture. I usually just lay the wet slices onto the flour, cover them, and lightly press the flour mixture into the tomato a little.

flour & cornmeal

Cook in hot oil until golden-brown, then turn them over and brown the other side. The tomato slices will soften as they cook, but don't let them get all mushy. If your slices are no more than 1/4-inch thick, they should get done about the time your coating is golden-brown.

hot oil

Drain slices separately on layers of paper towels, or in a wire basket or on a rack (though that won't get as much oil out as draining on paper), and serve HOT. We like ours with cold ranch dressing, but I'd love to hear any other ways of enjoying fried green tomatoes.

fried green tomatoes

fried green tomatoes!!

An alternate, and equally acceptable method is to simply dredge very thin green tomato slices in seasoned cornmeal mix and then fry them. That should get you a result like these slices, from a popular Arkansas country restaurant. Also yummy, if greasier and floppier.

fried green tomatoes