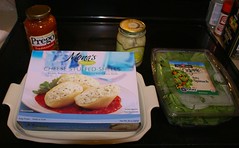
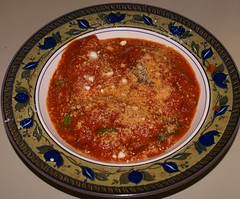
Friday night was another "cheater's" meal, meaning I used prepared/frozen ingredients.
INGREDIENTS:
1 box Mona's Cheese Stuffed Shells (frozen)
1 jar Prego Traditional pasta sauce
1 package organic baby spinach
Dressing of choice for spinach salad (optional)
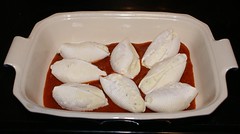
Pour half of pasta sauce on bottom of baking dish, arrange frozen pasta shells on top of sauce.
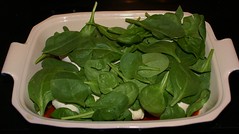
Layer fresh spinach on top of shells, as much as you like.
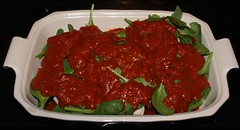
Pour the rest of the sauce over everything.
Cover dish with foil, bake in 400 degree oven for about an hour. Dish up, top with Parmesan cheese, and serve with spinach salad or steamed veggies.
Saturday, September 29, 2007
Friday, September 28, 2007
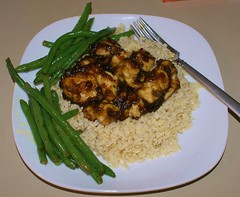
General Tso Chicken (Cheat Version)
Super quick and easy, uses a mix.
INGREDIENTS (serves 4)
1 pound chicken, white or dark, your preference, cut into 1-inch pieces
1/4 cup all-purpose flour
2 Tbsp. oil
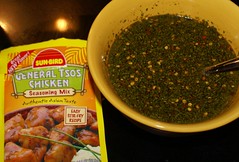
1 packet Sun Bird General Tso chicken seasoning mix
1/2 cup water (I think--just follow the directions on the packet)
1/4 cup sugar
2 Tbsp. soy sauce
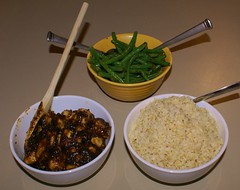
Instant brown rice, either boil-in bag or regular
Canned chicken broth or water with chicken bouillon
Whole green beans in microwave-steaming package
OPTIONAL: splash of teriyaki sauce for green beans
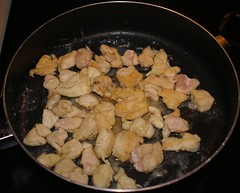
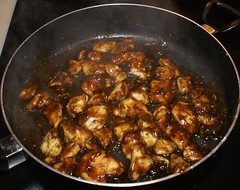
Put 1/4 cup flour in quart-size Ziploc baggie, add chicken pieces. Shake until chicken is well-coated with flour. Heat 2 Tbsp. oil in nonstick skillet, then place coated chicken pieces in hot oil and brown chicken on all sides.
In a small bowl, stir together packet of seasoning mix, water, soy sauce, and sugar until well-blended.
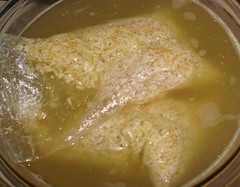
While chicken is cooking, prepare instant brown rice according to package instruction, except using chicken broth in place of water.
Add prepared seasoning blend to chicken pieces in skillet, toss until well coated, lower heat and cook down to desired consistency. NOTE: The long you simmer it, the thicker and stickier the sauce will be. Cooking time is short for this dish.
While the final simmering is going on, steam the green beans in the microwave. Once the chicken is done, empty the skillet and use it to toss the green beans with a splash of teriyaki for about two minutes, making optimal use of any General Tso sauce that might be left in the pan.
Serve it up and make everybody eat their beans! This really tasted like the General Tso chicken you might get at a Chinese restaurant, but without the heavy breading and deep-frying. I had to rinse most of the sauce from Bella's portion, because it was too spicy for her, and it cleared our sinuses! Family Rating: 6.5
Labels:
cheat,
chicken,
main course,
quick and easy,
stovetop,
whole meal
Thursday, September 27, 2007
What's Up With This, Belinda?
What is this thing, anyway? Well, I'll tell you what it's not. It's not a "how-to" blog. Not how to cook, how to clean, how to organize, how to de-clutter, how to save money, etc. These topics will be addressed here, though, because what this IS, is my attempt at assigning some credibility to myself, in a desperate attempt to GET IT TOGETHER, starting NOW. And "NOW" will be repeated every day. At least that's the idea.
I'm about to set out on a learning quest, and if I ever get to the end, I'll have become my mother, and then I can stop. But until that unlikely day, I'll be steadily trying. And I'm journaling my struggle here, because in making it public I'll hopefully feel more motivated to keep the personal growth going, and also because there may be (God help you) more out there like me, who go through these same challenges.
So, here's the deal. I'm a working mom, married, with one child, a preschooler. I'm tired just about all the time. Dinner is a daily angst-fest. I come home from work and errands, with Bella, exhausted and weary, and I've gotten to where the words, "What's for dinner?" make me want to HURT SOMEONE. And that's not good for anyone. Especially Alex.
Similarly, the house. It is a wreck. And that's putting it kindly. I just can't keep up with it, and I really don't understand why. From your comments over here, I'm starting to put together that this whole thing, this "keeping of a home" is all about PLANNING. And ORGANIZATION. And HAVING A REGULAR ROUTINE. Gee, just took me until I was 40 years old to catch on. Now, whether or not I can put any of this into practice is another thing altogether, and that will be the fun (FUN! There will be FUN here!) of this journal.
Want more? There is a mountain of laundry occupying most of the central portion of my house. And it's not like a temporary thing--it's there ALL THE TIME. Things are clean, but they never seem to be put away. Ahem.
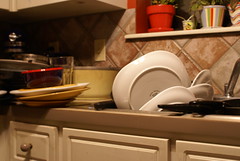
Dishes? Yeah. When they get like this, it's time to do something desperate. And that's pretty much when I make my first appearance in the kitchen in a dish-washing capacity.
Hey, stick around--there are sure to be MORE embarrassing photos of clutter, filth and squalor! Well, maybe. Unless I get leprosy, like that time on The Simpsons when Homer and Bart thought they had it from living in a messy house.
I would VERY much appreciate comments and especially tips from those of you who seem to have this sort of thing under control--you're everywhere, and YOU CAN HELP ME! I'm clueless.
What I'll be focusing on to start, hence the recipes posted so far, is meal-planning. On a recent post of mine at t'other blog, I got SO many great suggestions in the comments, and all of them boiled down to MENU PLANNING. So that is what I'm trying to do now, and I'll be posting something about every day's dinner, even if only briefly, so that I can keep track of what I'm doing, be accountable to myself for continuing to do it, and hopefully get suggestions from some of you on ways I could make it better.
Because right now, there just aren't enough hours in the day...and even when there ARE, I'm not making optimal use of them! What sort of madness is this? You tell me. I'll see you tomorrow for dinner. Lord, help me as I try to GET. IT. TOGETHER.
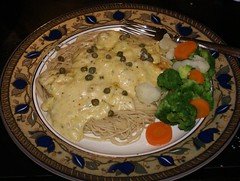
Creamy Herb-Chive Chicken & Pasta
This is one of my favorite dishes to make for myself and to serve for company. It cooks quickly on the stovetop, or you can cook the sauce and then pour it over fresh raw chicken in a casserole dish and bake it, covered, in the oven for a longer time, if you'd rather just put something on and get out of the kitchen for a while.
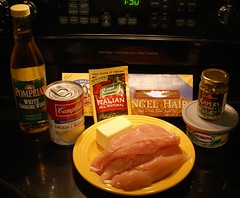
INGREDIENTS (for 4 servings):
1 pound chicken breast tenderloins
4 Tbsp. unsalted butter, lite butter, or Smart Balance
1/2 tub Philly Light cream cheese with chives
1 packet Italian dressing mix (like Good Seasons)
1 can low sodium cream of mushroom (or golden mushroom) soup
1/2 cup white cooking wine
1/2 box whole-wheat angel-hair pasta (Hodgson Mills makes some)*
*NOTE--if you'd rather use refined ("regular") pasta, use a whole box, as WW is more filling.
OPTIONAL, but very good additions: capers, marinated artichoke hearts, fresh asparagus
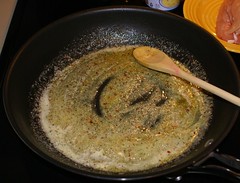
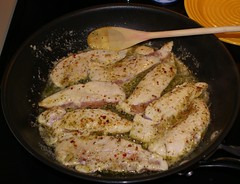
In a non-stick skillet on medium-high heat, melt butter. As soon as it's melted, very quickly add the Italian dressing mix. Since the dressing mix is salty, you might want to only add half at this time, taste-testing along the way. You can always add more later. Stir until well-blended, working quickly.
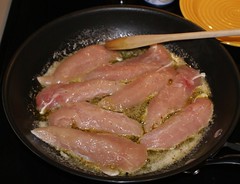
Get the chicken breast tenders on to cook, searing both sides well, but as quickly as you can. They'll have plenty of time to cook through later--right now you just want to sear the outside.
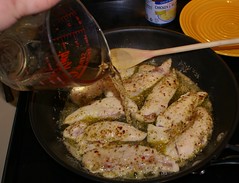
Once the chicken pieces are seared, add the 1/2 cup white cooking wine.
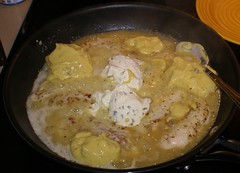
Immediately add the can of cream of mushroom soup, and the 1/2 tub of cream cheese.
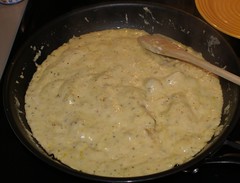
Stir to blend all ingredients until well melted and blended, then reduce heat and set chicken and sauce to simmer.
Meanwhile, be steaming veggies or making a salad to go along with your dinner, and setting a pot of water on the stove to boil for your pasta. Just about the time your side dish is ready, it should be time to put the 1/2 box of whole-wheat pasta on to cook. For my family, I have to cook whole-grain pastas well past the "al dente" stage, or my husband won't eat it, because he's spoiled to refined pasta! If you ARE using "regular" pasta instead of whole-grain, go ahead and use a whole box, because the whole-grain variety is much more filling.
Plate pasta, place chicken pieces on top, and pour sauce over all. Garnish with capers if your husband is weird and doesn't like them, preventing you from having cooked them in with the sauce. Serve with steamed vegetables or salad or sauteed asparagus.
If I were serving this for company, I'd use the oven-bake method, and chicken breast halves instead of tenders. I'd probably slice each individual breast in diagonal pieces, and fan the pieces slightly over each plate of pasta, then pouring the sauce from end to end over the middle.
Labels:
Belinda favorite,
chicken,
main course,
pasta,
quick and easy,
whole meal
Wednesday, September 26, 2007
Southern Fried Chicken
There are as many variations on frying chicken as there are cooks who make it. I'm only going to talk about the ways I make it, and the way I consider to be the best.
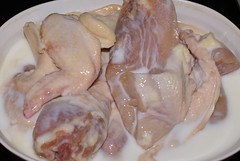
This is NOT a dish I make frequently, because, let's face it, it's FRIED chicken, and not exactly diet-friendly. But 3 or 4 times a year, it's a delicious, special treat. I normally use boneless, skinless breast and thigh fillets, but sometimes (like in the pictures to follow) I'll use a cut-up whole chicken, as-is, because Alex likes it that way.
Lots of people deep-fry chicken. I deep-fry nothing, because I find the grease absorption to be just too much, plus you don't have as much control during the cooking process. I pan-fry chicken, and I do it one of two ways that my mother and her mother and her mother did it. One of the only things I added of my own to the process is that I marinate the chicken, sometimes overnight, in buttermilk before cooking. The acid in the buttermilk tenderizes the chicken and helps it retain moisture.
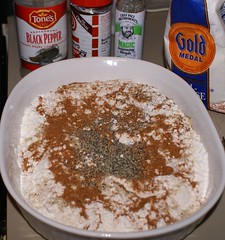
When it comes to coating the chicken, you need a wet component and a dry component. You can just use the buttermilk for your wet wash, taking the chicken pieces directly from buttermilk to the dry coating, and that works just fine, and is the method I used here. But for "classic" fried chicken, you'll want to make your "wash" with eggs. Beat a few eggs with a splash of milk, and use the dry-wet-dry method of coating the chicken: dredge each piece in your flour mixture, then dip it in the egg mixture, then dredge in the flour again. About the flour mixture--just season a shallow dish full of all-purpose flour with whatever suits your taste. It could be as simple as plain ol' salt and pepper, but you can add everything from seasoned salt to poultry seasoning to dried herbs. Just be sure it's blended well with the flour.
Of course, you don't want to coat the chicken pieces until the minute you're ready to cook them. Use a heavy skillet, preferably cast-iron, and pour in about 1/2-inch (less if you're using boneless cuts--you only want the oil to cover about 1/3 of each chicken piece) of fresh vegetable oil (never re-use cooking oil). Heat the oil to medium-high--you'll know it's ready when a bit of flour dropped into the hot oil sizzles. DO NOT add chicken until the oil is hot!
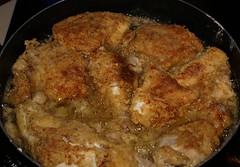
Place coated chicken pieces "pretty side" down in the skillet, and cook at med-high heat until the bottom side is golden-brown. Now you have a choice to make. If you're pressed for time, or if you just like your chicken very crispy, you can turn it over and simply continue to cook it, quickly, at the same heat until it's golden-brown all over and juices run clear when you pierce a piece in its thickest part. That will produce a fine result that anyone would be proud to serve.
BUT. If you want "classic" Southern-Fried Chicken, tender and juicy and melt-in-your-mouth divine, you'll do it just a little differently. Turn the pieces over, then reduce heat to medium-low, cover the skillet, and leave it alone for another 20-30 minutes or more, depending on the thickness of the cuts. The result is well worth the extra time, and will have people in awe of your chicken-frying prowess.
One note--no matter how you're tempted, do not crowd the chicken pieces in the skillet. The skillet shown here is a bit crowded.
Compatible side-dishes for Southern fried chicken include, of course, mashed potatoes and gravy (I'll add a separate post on making chicken gravy--it's easy when you know how, and not nearly as unhealthy as you might think), green beans served with pepper-vinegar sauce, corn on the cob, chow-chow or corn relish, and fried okra. In warmer weather, or for picnics, potato salad and coleslaw are good choices. I've never quite understood or agreed with the serving of baked beans with fried chicken, but apparently a lot of people like that.
Homemade (don't you DARE serve canned) biscuits are a must with fried chicken, and I'll post that recipe next, because it's quick, easy, and delicious, and the same recipe lends itself to delicious chicken and dumplings.
Labels:
chicken,
family favorite,
main course,
Southern,
stovetop
Tuesday, September 25, 2007
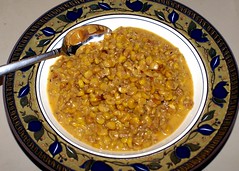
Corn Macque Choux, Paul Prudhomme Recipe
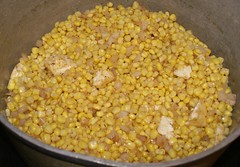
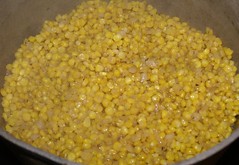
This is one of Alex's all-time favorite dishes, and this most recent occasion, he actually made it for himself, leaving me free to document the creation of this fabulous dish that not many people outside the deep South have heard of. (Click any photo to go to its flickr page.)
Ingredients for 10-12 side-dish servings, or 4-6 main course servings:
4 Tbsp. unsalted butter (we just go ahead and use salted)
1/4 cup vegetable oil
7 cups fresh corn kernels, about 14 ears (we use fresh-frozen corn kernels)
1 cup very finely chopped onions (again, we use pre-chopped, frozen onions)
1/4 cup sugar
2 tsp. Chef Paul Prudhomme Vegetable Magic (we used Poultry Magic)
2 1/4 cup vegetable stock or frozen corn kernels (once I used frozen creamed corn)
4 Tbsp. margarine (we just used the rest of the butter)
1 cup evaporated milk, total (I have also used heavy cream with great results)
2 eggs (we set ours out so they'd be room temp.)
In a large skillet, preferably nonstick (we actually use a big heavy Dutch oven), combine the butter and oil with the corn, onions, sugar, and Vegetable Magic.
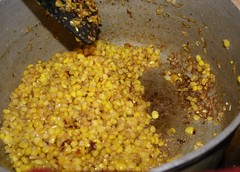
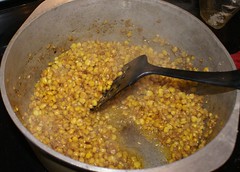
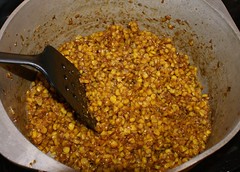
Cook over high heat until the corn is tender and a crust starts to form on the bottom of the skillet, about 15 minutes, stirring occasionally, then stirring more as the mixture starts sticking (you WANT the mixture to stick).
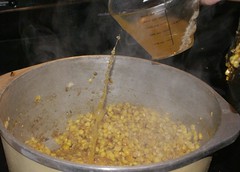
Gradually stir in 1 cup of the stock, scraping the bottom of the skillet to remove the crust as you stir. Continue cooking for 5 minutes, stirring occasionally.
Add the margarine/butter, stir until melted, then cook for an additional 5 minutes, stirring frequently and scraping the pan as needed.
Reduce heat to low and cook about 10 minutes, stirring occasionally, then add 1/4 cup additional stock and cook about 15 minutes, stirring fairly frequently. Add the remaining 1 cup of stock and cook about 10 minutes, stirring occasionally.
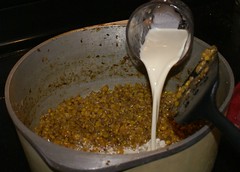
Stir in 1/2 cup of the evaporated milk and continue cooking until most of the liquid is absorbed, about 5 minutes, stirring occasionally.
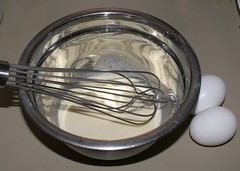
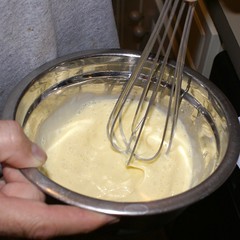
Remove corn from heat. Combine the eggs and the remaining 1/2 cup milk in a bowl and beat with a whisk about 1 minute, until very frothy.
Add this mixture to the corn, stirring well. The heat from the corn will cook the eggs just enough to give the dish a frothy texture. Serve immediately.
Labels:
Alex Favorite,
corn,
main course,
side-dish,
vegetarian
Subscribe to:
Comments (Atom)

